3D Object Registration and Scanning
For this example, we will use a Universal Robots UR5e simulated in Gazebo to perform object registration and scanning tasks.
Setup
To launch this configuration, run:
moveit_pro run -c picknik_ur_gazebo_scan_and_plan_config
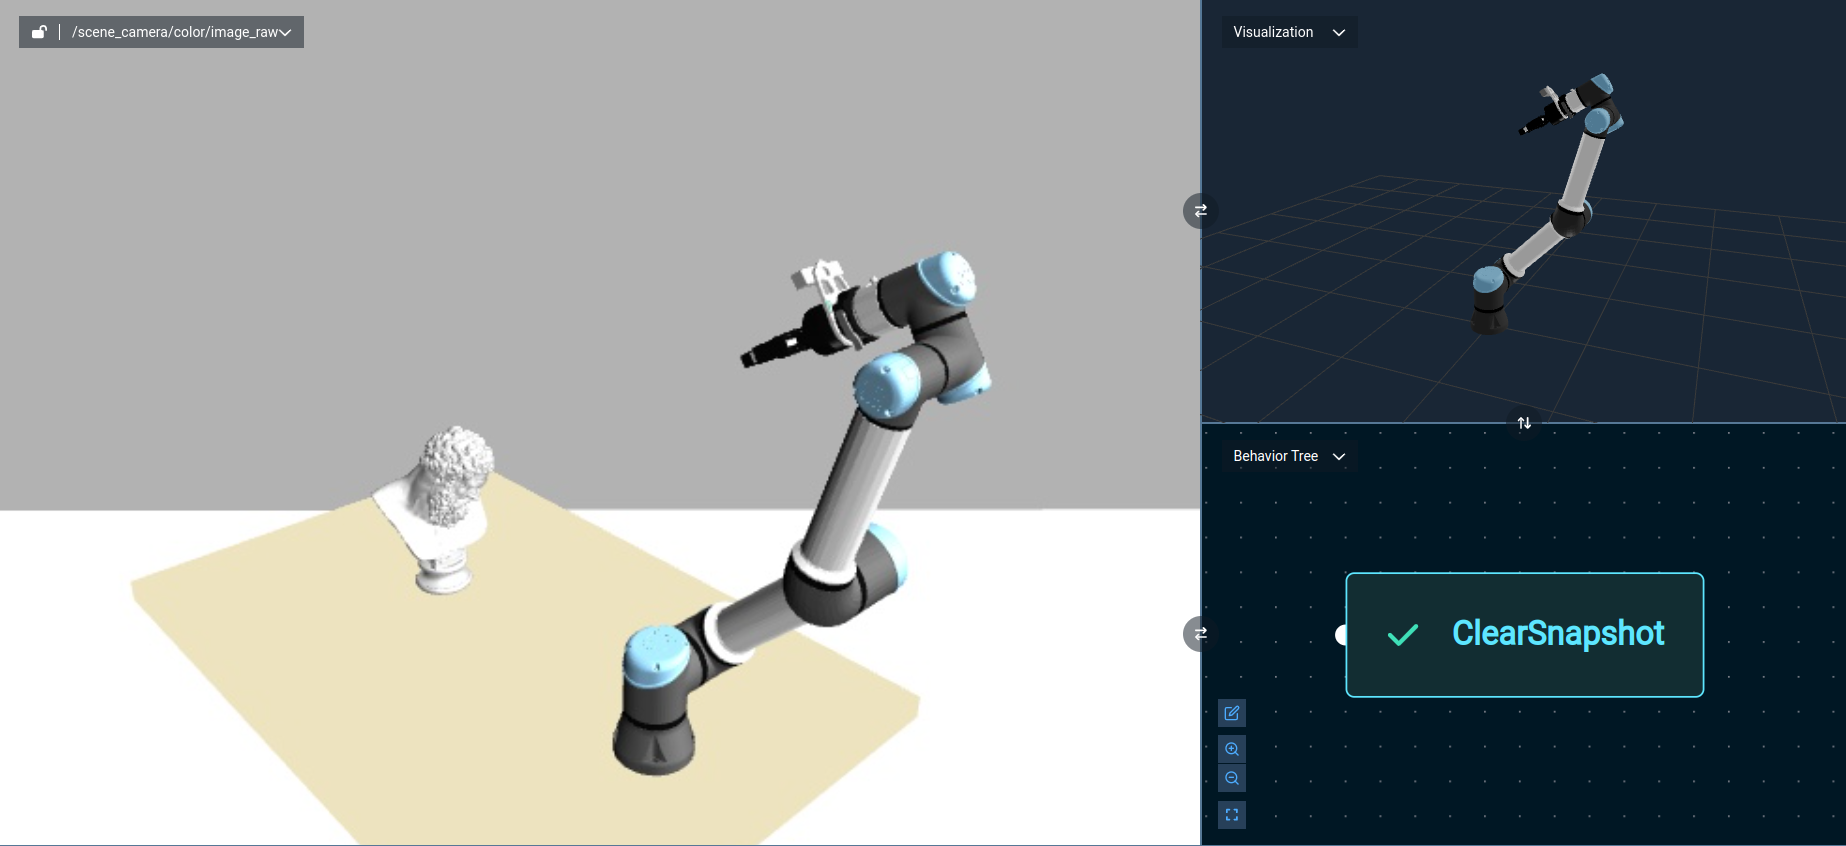
Once the web app is loaded, you can visualize one of the camera feeds to see the simulated scene. From the default starting position of the robot arm, you should see a Hercules head statue.
Point Cloud Registration to a 3D Mesh
MoveIt Pro can load 3D mesh files, in .STL format, and convert them to point clouds by sampling their faces. Then, we can use the Iterative Closest Point (ICP) algorithm to register a live point cloud from the robot camera to this ground truth mesh. The output of registration is the estimated 3D pose of the object, with respect to a given coordinate frame.
The workflow for doing this is:
- Move to a predefined waypoint that can get a good approximate view of the object.
- Load a point cloud representing the ground truth file, using the
LoadPointCloudFromFileBehavior. - Get point cloud data from a sensor and transform it from the sensor frame to the world frame, using the
TransformPointCloudFrameBehavior. - Register the live point cloud to the ground truth point cloud from the mesh, using the
RegisterPointCloudsBehavior. - Note that the ICP algorithm requires an initial pose estimate, which can be initialized with a
CreatePoseStampedBehavior. - Visualize the results by transforming the point cloud and sending it to the UI, as shown below.
To run this example, execute the Object Registration Objective.
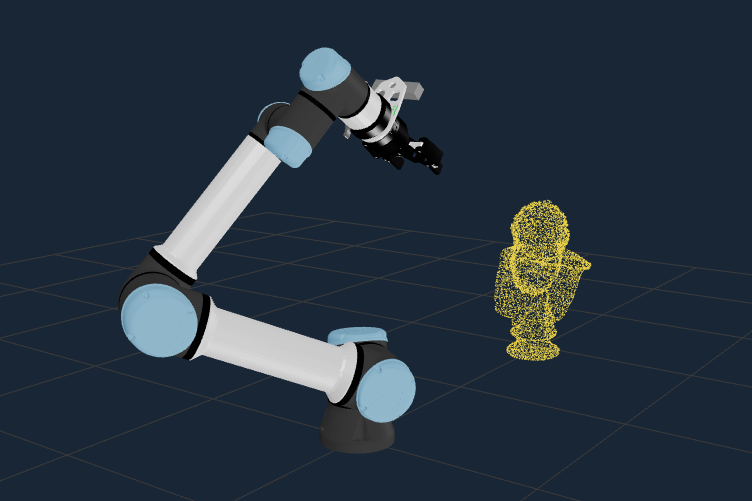
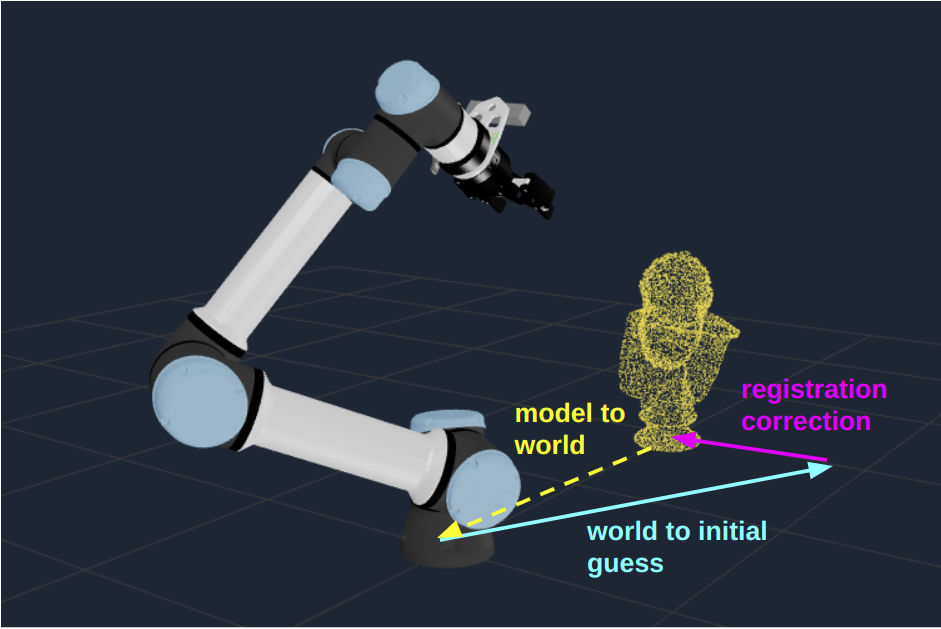
By performing object registration, we can approximate the transform from origin of the registered model to the world frame, as shown below.
This transformation, denoted in the Objective as {model_to_real_pose}, will be useful for the next step.
Executing a Trajectory Relative to the Registered Object
Now that we have registered our object, we have an updated estimate for its pose in the world.
Again, this corresponds to the {model_to_real_pose} blackboard variable.
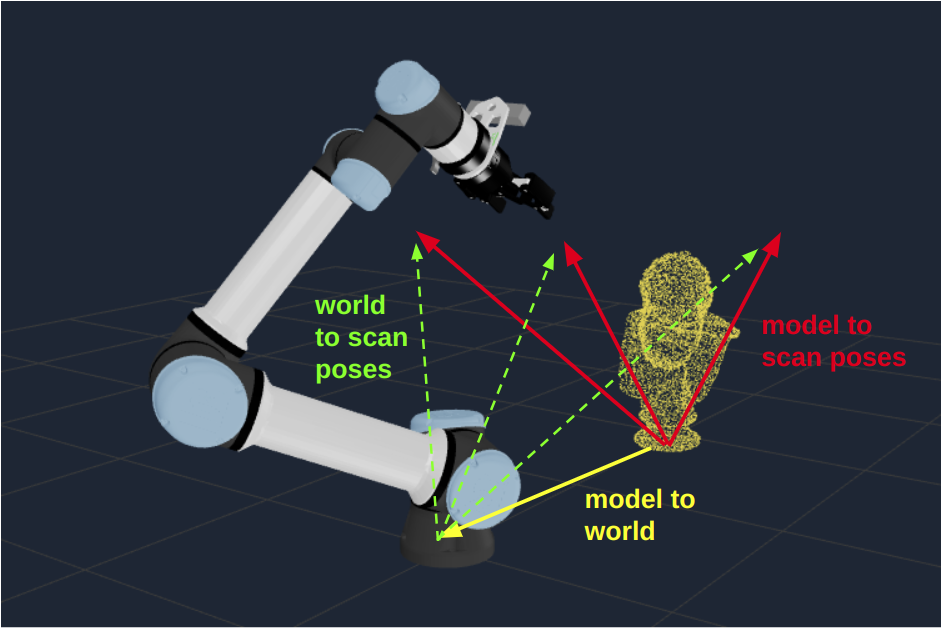
With this, we can scan the object to perform a 3D reconstruction from multiple viewpoints. Importantly, these viewpoints will be expressed as poses with respect to the registered object transform. This ensures that the 3D reconstruction path is robust to different placements of the object, so long as the object can be successfully localized from the initial viewpoint.
For our 3D reconstruction task, we will add the following to our Objective:
- Load a list of poses from a file, using the
LoadPoseStampedVectorFromYamlBehavior. - Using the
ForEachPoseStampedBehavior, loop through each of the poses above. For each pose,- Transform the pose, which is expressed with respect to the model origin, to the world frame. This uses the
{model_to_real_pose}variable from our previous step. - Move the robot’s
grasp_linkframe to the transformed pose. - Take a point cloud snapshot at the new pose.
- Append the point cloud snapshot to a vector of point clouds, using the
AddPointCloudToVectorBehavior.
- Transform the pose, which is expressed with respect to the model origin, to the world frame. This uses the
- Once all the poses have been explored, merge the point clouds with the
MergePointCloudsBehavior. - Visualize the results by sending the merged point cloud to the UI, as shown below.
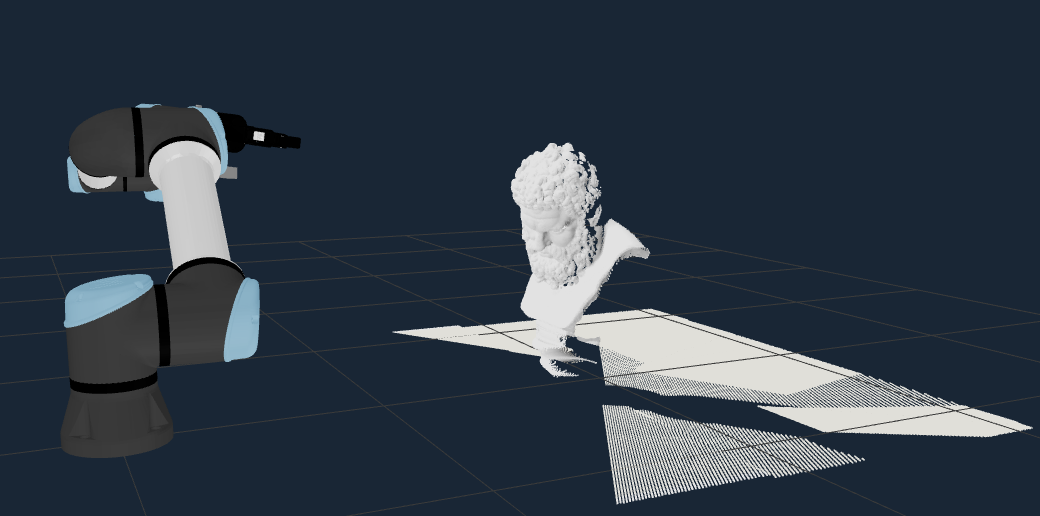
To run this example, execute the Object Inspection Objective.
Note that the list of poses can be found in your ${HOME}/.config/moveit_pro/picknik_ur_gazebo_scan_and_plan_config/objectives folder, with the name trajectory_around_hercules.yaml.
Below are the file contents, which you can modify to see how the results change.
---
header:
  frame_id: "world"
pose:
  position:
    x: 0.4
    y: -0.2
    z: 0.4
  orientation:
    x: -0.707733
    y: -0.2459841
    z: 0.2931526
    w: 0.5938581

---
header:
  frame_id: "world"
pose:
  position:
    x: 0.0
    y: -0.2
    z: 0.4
  orientation:
    x: -0.7660447
    y: 0.0
    z: 0.0
    w: 0.6427873

---
header:
  frame_id: "world"
pose:
  position:
    x: -0.4
    y: -0.2
    z: 0.4
  orientation:
    x: -0.707733
    y: 0.2459841
    z: -0.2931526
    w: 0.5938581
This means that the object reconstruction will move through the 3 poses identified above, which are expressed in the world coordinate frame, and relative to the registered object pose.
Next Steps
In this tutorial, you have seen some example Objectives for 3D object registration and scanning. You can augment the capabilities of your robot in several ways, including:
- Trying this approach with a different 3D object – for example, for manufacturing applications.
- Incorporating fallback logic when registration fails, such as retrying with new viewpoints.
- Using geometric processing Behaviors to fit a plane to the ground surface and remove it before registration.
- Using machine learning based segmentation models to segment the point cloud to the object of interest before registration.
- After performing 3D reconstruction of the object, perform additional inspection or manipulation tasks – for example, grasping the object or inserting fasteners into key frames on the object.